Little Planets
Published on 17 June 2010
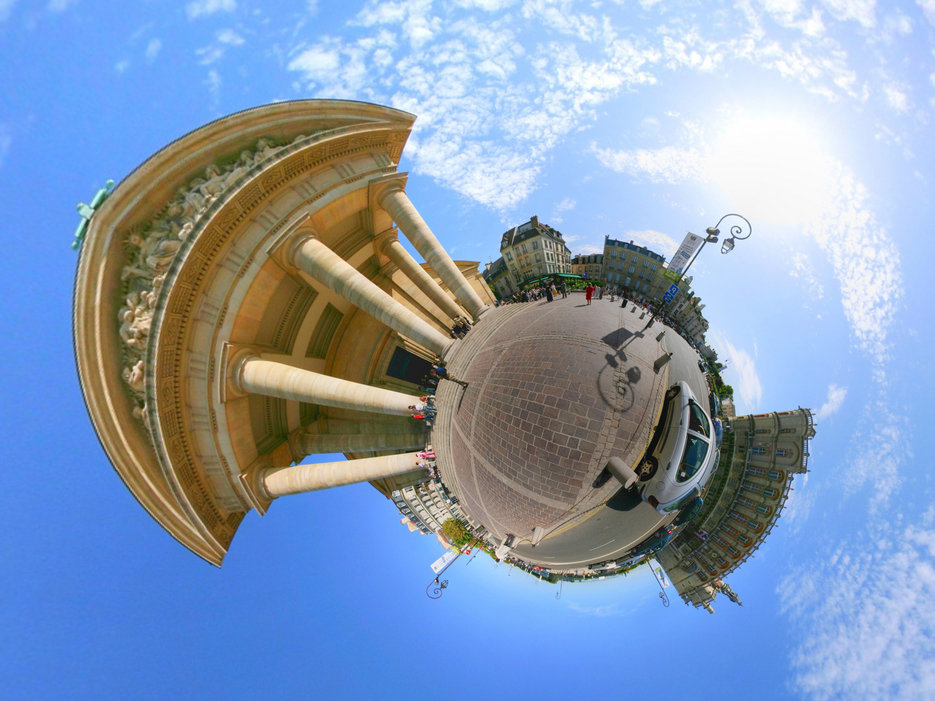
Little planets are created by applying a stereographic projection to a spherical panorama. It is possible to seamlessly move from a birds-eye view in the sky to that of a bug on the ground!
 The classic little planet effect. View original panorama.
Equirectangular panoramas
To generate these images we start with a spherical (equirectangular) panorama. This is an image where the x-axis corresponds to the longitude around a sphere (0-360 degrees) and the y-axis is the latitude (-90 to 90 degrees). For any longitude or latitude position on a sphere we can retrieve the colour directly from the corresponding x,y coordinates on the panorama image. A proper equirectangular panorama should be twice as wide as tall, e.g. 1024x512 pixels.
Creating equirectangular panoramas is quite an art. If you want to create your own a few tutorials have been written on the subject. Luckily there is a huge selection of creative-commons licensed panoramas on Flickr we can start playing with.
Stereographic projection
Stereographic projection is a mapping that projects a sphere onto a plane, as illustrated with the world map below. It is conformal, which means that it preserves angles locally (note the grid lines still cross each other at right angles) although it doesn't preserve areas or distances.

As we already have the colour of each longitude and latitude point on a sphere from the equirectangular panorama the inverse stereographic projection formulas are used, as described by Mathworld.
Φ is the latitude and λ is the longitude. The parameters Φ0 and λ0 are user controlled and effectively set the projection point viewing position (try clicking and dragging the Flash demo below). R is the radius of the sphere, which controls the zooming effect.
Φ = asin( cos(c) sin(Φ0) + (y sin(c) cos(Φ0) / r )
λ = λ0 + atan( x sin(c) / (r cos(Φ0) cos(c) - y sin(Φ0) sin(c) )
which relate to the pixel x,y positions via:
r = sqrt(x2 + y2)
c = 2 atan( r / 2R )
Interactive Little Planets
Click and drag your mouse in the Flash movie below to change the longitude and latitude of the viewing point. Press any key to change the panorama image.

Download and installation
The Little Planets plugin will work with Adobe Photoshop, After Effects CS4+ or directly using the free Pixel Bender Toolkit (PBT). See the Pixel Bender Technology Center for details on setting it up for your system.
PBT: Just open the LittlePlanets.pbk file, choose a source panorama image and hit 'Run'.
Photoshop: Copy the LittlePlanets.pbk to 'Pixel Bender Files' folder within your Photoshop installation directory. Note, you need to have the Pixel Bender Plug-in for Photoshop CS5 installed first.
After Effects: Copy the LittlePlanets.pbk file into the Plug-ins/Effects folder for your installation.
Flash: There is an example Flash file used to create the movie above.
Usage
 Input image size: must be set to exactly the same width and height of the source panorama in order to get a seamless result. When using within PBT you can use an image up to 4096x4096 pixels to create the highest quality results.
Output image size: the final output size. Best results are often obtained when the input image size is at least twice the output size.
Center point: pan the image to centre the area of interest.
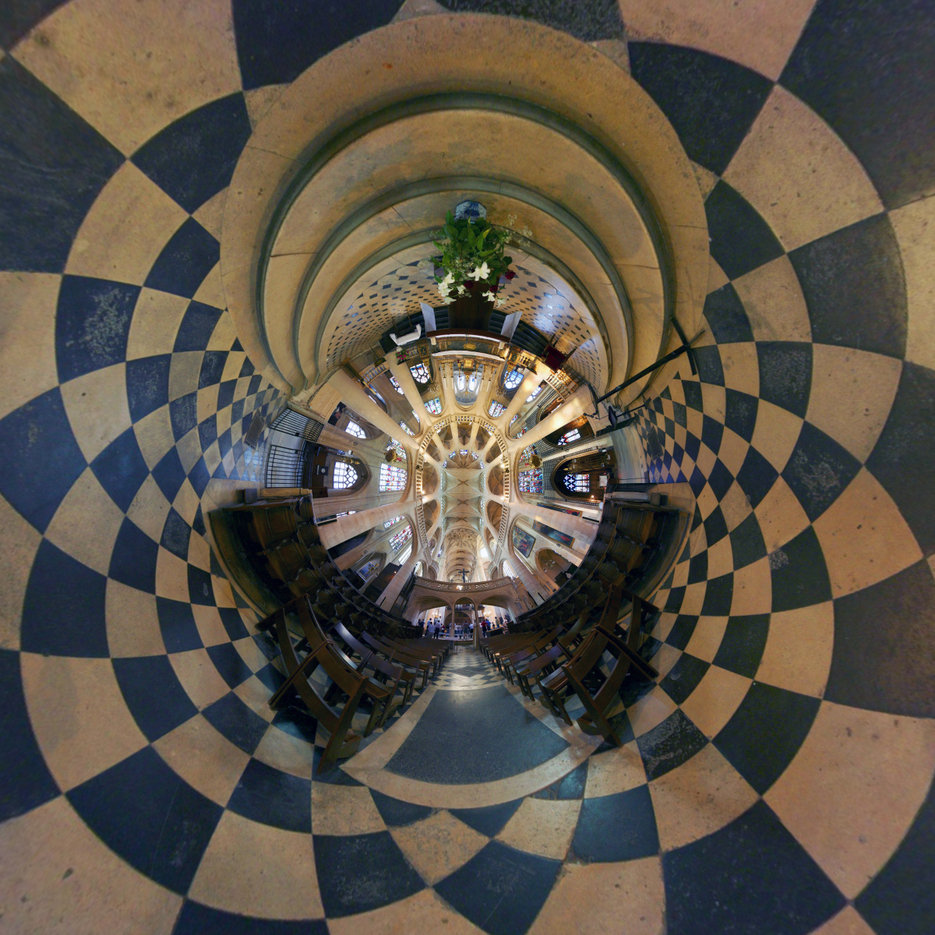
Longitude and latitude offset: positions the projection eye. Try pushing the latitude above about 180 degrees to transform the planet into a tunnel!
Zoom: has the same effect as the field of view.
Wrap effect: wrap the projection as you zoom into the image from planet to tunnel. A 'Droste'-like effect.
Twist: twist the image by an amount proportional to its distance from the centre.
Bulge: can create some crazy distortions.
Super sampling: option to average 4 or 9 samples per pixel to smooth details where the image is shrunk. Useful when creating animations.
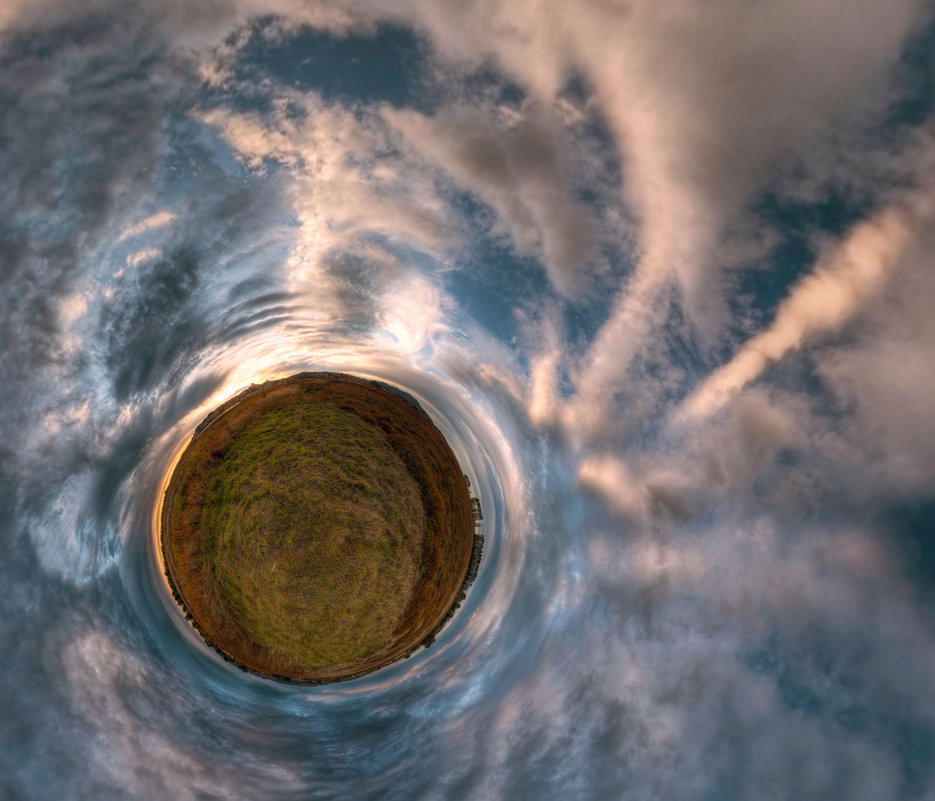
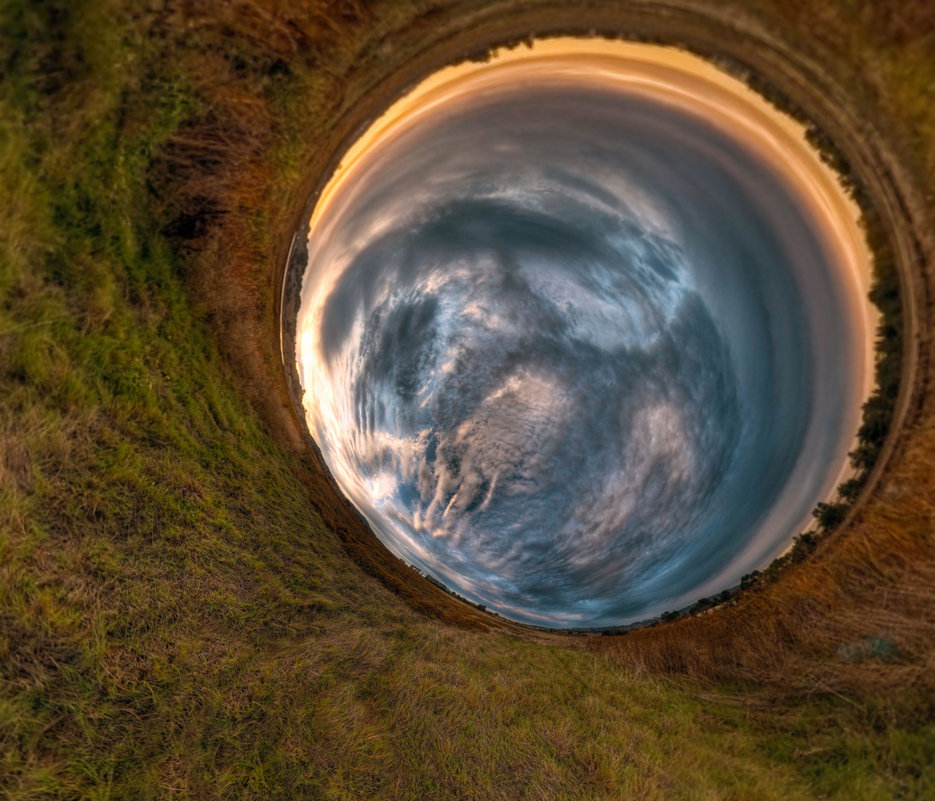
 Push the latitude more than 180 degrees and you get a tunnel instead! View original panorama.
Image credits
The panoramas I used in this article were taken from Flickr and are creative-commons licensed:
- Kyu Shiba Rikyu Garden: on the bridge by heiwa4126
- Outside the Saint Germain en Laye church by Seb Przd
- Immersive Saint Etienne du Mont by Seb Przd
- Green Eiffel by Gadl
- Equirectangular world map
Also thanks to Josh Sommers for suggesting the filter in the first place and beta testing it.
Check out some of his amazing work!
All images on this page released as Creative Commons, attribution, share-alike, noncommercial.
Update: there is another implementation of stereographic projections using a different algorithm for Pixel Bender and Flash over here that I wasn't aware of.
Last updated: 17 June 2010
17 Comments
Links & further reading


Related posts
- The Formula
- A music video collaboration with 'The Formula'
- 3D Mandelbulb Ray Tracer
- Scripts for ray tracing Mandelbulbs, the closest thing to true 3D Mandelbrot fractals
- 4D Quaternion Julia Set Ray Tracer
- This GPU shader renders real-time Quaternion Julia set fractals with ambient occlusion.
- Artforms of Nature
- A fractal twist to the ever inspiring illustrations from the nineteenth century German biologist Ernst Haeckel.
- More blog posts
Amazing! This helps me to understand how The Universe could be wrapped around. And I think my monitor has a dead pixel now ;-)
brilliant!
you've added very flexible and useful parameters: in the toolbox !
and as always, very nice examples :)
thanks
I love the interactive viewer!
Great work as always.
Amzing views there...really clever stuff, kind of makes you feel like you're in a revolving tunnel!!
Wow, this filter is great! Thanks, subblue!
Everything looks better turned inside out!
I really liked the Interactive Little Planets created by you. It's looks superb and an awesome creative art. The thing is really liked is the effect while dragging on it using the mouse.
Very nice plug in and an awesome tunnel effect in the picture with the Eiffel Tower !
Things get better, its a nice and original concept.
Just a question
What kind of lens do you use for this?
I like the Interactive Little Planets but when you move the mouse back and forward a tunnel effect appears. Great plugin anyway. Good job!
Oh! The Interactive Little Planets demo is a view of Saint-Germain en Laye in front of the castle ! Oh :-)
I can't figure this out. I'd like to use this in After Effects with a 360° panorama I shot, but as soon as I enable the plugin in AE 5.5 all I get is a black screen. I'm not finding any tutorials on how to use it, and I'm still pretty new to After Effects. Any tips?
This plugin is amazing! I love it!
It will be of a lot of help for the music video!
Thank you very much!
:-D
Is there a way to tweak the code to allow for higher res input/output? I love your page, thank you for all the inspiration.
You can check out one of my "Little Planets" on my homepage. It's Oahu, where I live.
According to the Adobe blog Adobe axed Pixel Bender in July 2012. See http://blogs.adobe.com/jnack/2012/07/changes-to-pixel-bender-support-2.html
My copy of PS CS5 behaves like it does not allow Pixel Bender to be installed. So all the technology listed in this subblue Little Planets blog is no longer available. Sad.
Pixel Bender won’t install on CS6 either, so Little Planets is not available on CS6. Sad. Anything planned to make it somehow compatible? Adobe said it discontinued support for Pixel Blender after CS5.
I realize this is old news, but thanks a lot for the plugin! It works perfectly in After Effects CS5. Here's an animation using a panorama I shot: http://www.flickr.com/photos/eahart/10825840846/