4D Quaternion Julia Set Ray Tracer
Published on 20 September 2009
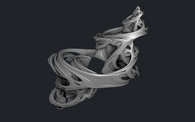
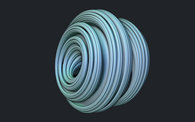
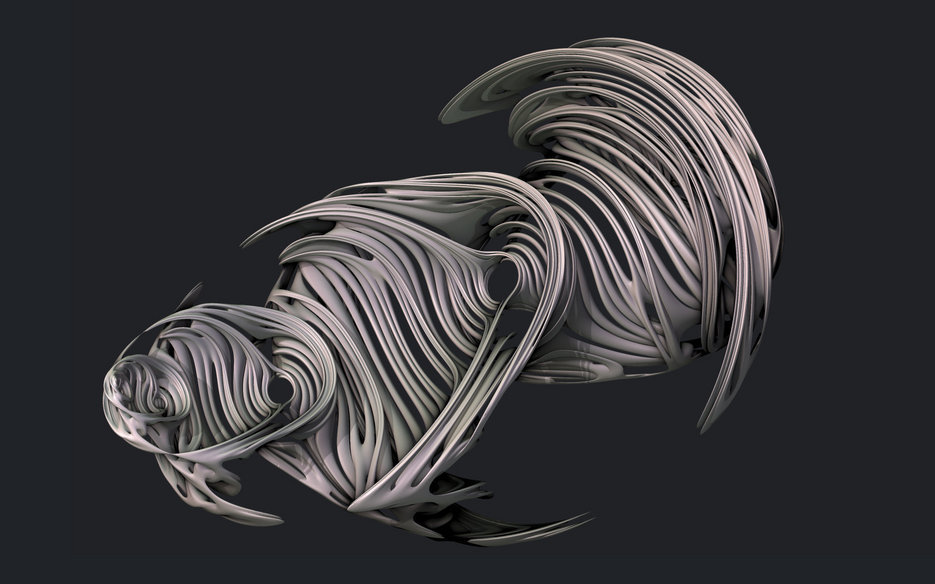
A quaternion Julia set is a four-dimensional equivalent of the standard two-dimensional fractal. By taking a 3D 'slice' through the 4D space it is possible to visualise a solid fractal.
This quaternion Julia set ray tracer is a port of Keenan Crane's Cg GPU implementation for Adobe Pixel Bender and a more general GLSL shader patch for Quartz Composer. The Pixel Bender version lets you render out high resolution images in Photoshop CS4 (or animate the parameters in After Effects). The Quartz Composer patch lets you animate any parameter in real-time.
The maths bit
Complex numbers have two components that define a point in a plane and are the core build blocks of fractal calculations. In 1843 the Irish mathematician Sir William Rowan Hamilton developed quaternions as a way of describing complex points in three-dimensional space. The only snag was he had to add a fourth dimension to make the maths work (hence the quad part of the name). Whilst complex numbers are described as the sum of a real and imaginary component: z = a + bi, quaternions are similar but have three imaginary components: z = a + bi + cj + dk
Fractals can be calculated using quaternions with the usual equation zn+1 = zn2 + c where we track which points have a magnitude greater than the bailout threshold. The problem is trying to visualise the set of 4D points in 3D space. At this point I'll direct you to an excellent write-up Keenan has posted that describes the process in detail.
The ray tracing bit
The ray tracing is actually more like the ray-marching process I used in the procedural terrain renderer; a ray vector is fired into the scene and stepped forward until it gets within a collision threshold of the fractal. This brute-force approach is very inefficient but fortunately there are couple of optimisations that can be taken advantage of.
Firstly, a bounding sphere is defined as the limit of the fractal and used as the starting point for the initial ray vector for each pixel. This removes any unnecessary stepping at the start.
Secondly, there is a distance estimator function that will return the distance to the closest point on the Julia set for any z point in quaternion space. The distance estimator accelerates the ray tracing by a method called unbounding volumes, described in the paper Ray Tracing Deterministic 3-D Fractals [John Hart et al, 1989]. At each point of the rays journey through quaternion space the distance estimator returns the distance to the closest point in the Julia set. It means the next step the ray takes can be of this amount, which greatly reduces the overall number of steps required to intersect the fractal surface.
When the ray comes within a defined collision distance, epsilon, of the fractal surface the ray marching is stopped. Note, a fractal has an infinite level of detail so the epsilon factor acts to smooth out the surface and make it renderable.
The normal vector for each point is generated from the gradient of the approximate fractal surface. The full technique is described in the paper mentioned above.
Shading and ambient occlusion
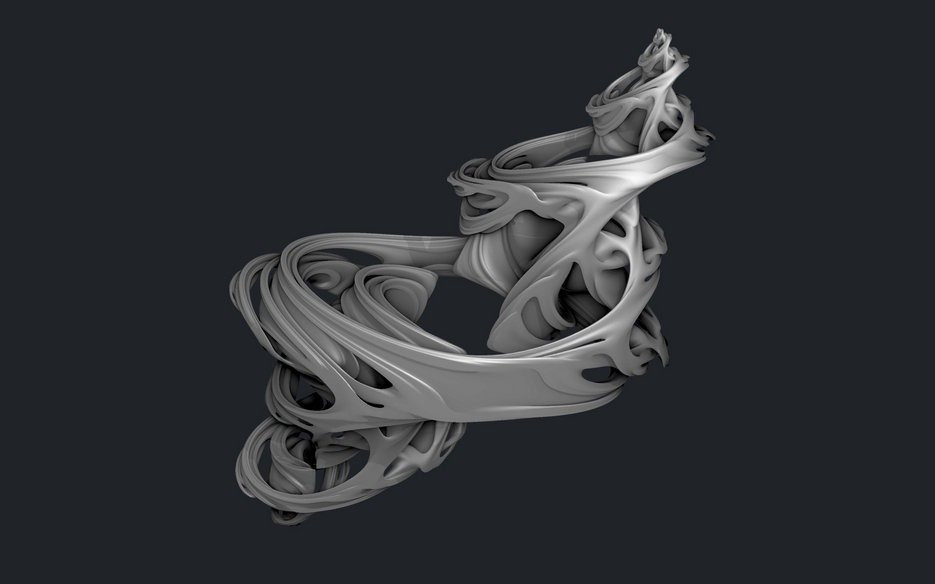
My contribution with this shader is the addition of a basic ambient occlusion (AO) parameter. AO darkens areas of a surface that are in close proximity and less likely to receive light from its surroundings. When combined with standard shading, ambient occlusion gives a far more realistic looking image.
AO has been applied to quaternion Julia set fractals before by Inigo Quilez and animated here. However, these implementations are quite involved requiring multiple passes and extra sampling. The implementation used in this ray tracer is just an approximation and not physically accurate, but does add a visual improvement at very little additional computational cost.
Simply darken the surface by a factor proportional to the number of ray tracing steps taken for each point and the result is comparable to ambient occlusion. It works thanks to a side effect of the unbounded volume ray tracing approach; points that are least occluded are likely to be reached in fewer steps as the distance estimator function will return a large step size for the ray. Whereas rays to points nested in creases or dips will require more steps because the neighbouring surfaces will cause the distance estimator to return a smaller step size.
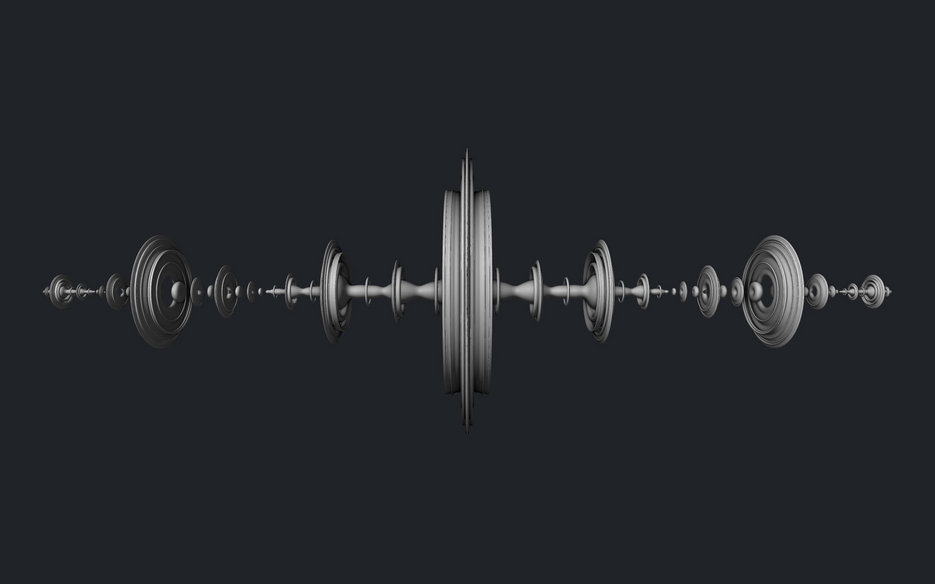
The image below illustrates the different components that makes up the final surface. Top row, left to right: pure ambient occlusion, pure phong. Bottom row: ambient occlusion and phong combined, and finally everything; a base colour with specular highlights and ray traced shadows.

Download and installation
Download the Quaternion Julia set ray tracer
Updated 14/12/2009 to fix an After Effects rendering bug.
For Pixel Bender open the QuaternionJulia.pbk file with the Adobe Pixel Bender Toolkit or copy it into the Pixel Bender Files folder in your Photoshop CS4 installation directory (you will need to have installed the PB plugin for Photoshop first).
The Quartz Composer patch was created with Quartz Composer 4, which is part of the new XCode. It will also work with QC3 as the patch is just a GLSL shader. I've had it running without antialising at up to 30fps @ 600x400 on my iMac with an NVIDIA GeForce 8800GS.
Just after porting this to Quartz Composer I discovered that Apple have released an OpenCL implementation for Snow Leopard. With native support now built into Snow Leopard, OpenCL opens up some very exciting possibilities for future projects.

Last updated: 14 December 2009
27 Comments
Links & further reading
- Download Quaternion Julia set filters
- Quaternions
- Paul Bourke on Quaternion Julia fractals
- Keenan Crane's original GPU implementation
- OpenCL Quaternion Julia example
- Ray Tracing Deterministic 3D Fractals
A PDF of the original paper that describes the algorithm for ray tracing the Julia set.


Related posts
- Introducing Frax
- The project I've been working on for the last two years...
- A Series of Snowflakes
- A selection of subverted seasonal snowflakes
- L'Eclaireur
- A series of looping animations from an installation at L'Eclaireur in Paris.
- Music Box
- A journey into a Fabergé inspired world.
- More blog posts
Beautiful, the whole thing reminds me of "The Spaghetti Incident?" by Guns N' Roses ;-)
I am trying to bend my mind and imagine taking a 3D 'slice' through the 4D space... doesn't go through quite easily.
Great work, and helpful explanation.
I wonder what it would look like to take the intersection of the 4D Julia set with a 3-sphere and stereographically project that to flat 3-space for rendering...
just a thought
Very elegant approximation for the AO. Marvelous work.
Very cool! Voted for it on CGDigg
Does this require SnowLeopard to run at breakneck speeds?
On my Mac Pro Quad 2.66 it runs at 0,5-0,92 fps in Leopard, In Quartz Composer.
Looks beautiful though :)
Chrleon: the fps is determined by your graphics card as the Quartz Composer patch is basically a pure GLSL shader that runs entirely on the GPU. Obviously the bigger the rendering window the slower it will run. I've had it running in Leopard and Snow Leopard with QC 3 & 4 at respectable frame rates.
nice, but how about more complex quaternions. for example check this quaternian animation out: http://vimeo.com/4573708
WoW very beautiful !
Awe-inspiring work... well done.
I encountered and an issue when running this pbk in After Effects.
The quaternion-shape does not show up like when opened in photoshop/pb toolkit.
It looks much less detailed and somehow wrong, no matter what settings i use.
I'd be very pleased if you got a hint for me.
Thanks in advance!
Oppenheimer: with After Effects the filter is rendered with the CPU rather than the GPU so there must be some subtle numerical differences. I'll have a look into it.
Do you think there is a way to force AE to use only the GPU instead of the CPU?
Some neat workaround like throttling the CPU to a low level that it automatically switches to GPU mode.. just an idea..
Another question would be if its possible to write a sort of script for Pixelbender that enables us to animate certain parameters of a PB-script and incrementally save pngs?
Jesus! That probably has a little practical use right now, but is surely a piece of art =)
Very Beautiful,
@ quatter , Nice sharing, I really liked that one.
oppenheimer: I think I've fixed the After Effects bug. Download the filter again and let me know if it is now working for you.
The After Effects bug seems to be fixed now. Great work Tom!
(You might want to change the link in the top right corner to the updated file.)
Another question:
Is there a way to speed up things in AE?
The toolkit gave me really decent speeds, but AE crawls like a snail...
Thanks oppenheimer, that's great to hear. I've fixed the download link too.
Unfortunately in After Effects the filters run on the CPU rather than the GPU so they are significantly slower. Hopefully in the next version Adobe will add GPU rendering support.
Hi,
brilliant work.
may i use the images in certain non-commercial works?
Thanks Krishna. The images you generate with this script are yours to use however you like, commercial or not :)
Hi Tom, great work with this plugin! Having a lot of fun playing around with it in Photoshop.
I was wondering, is there any way to get above 2048 x 2048 in size? I'm not sure my graphics card would handle it, but I'd love to try a bit bigger if possible.
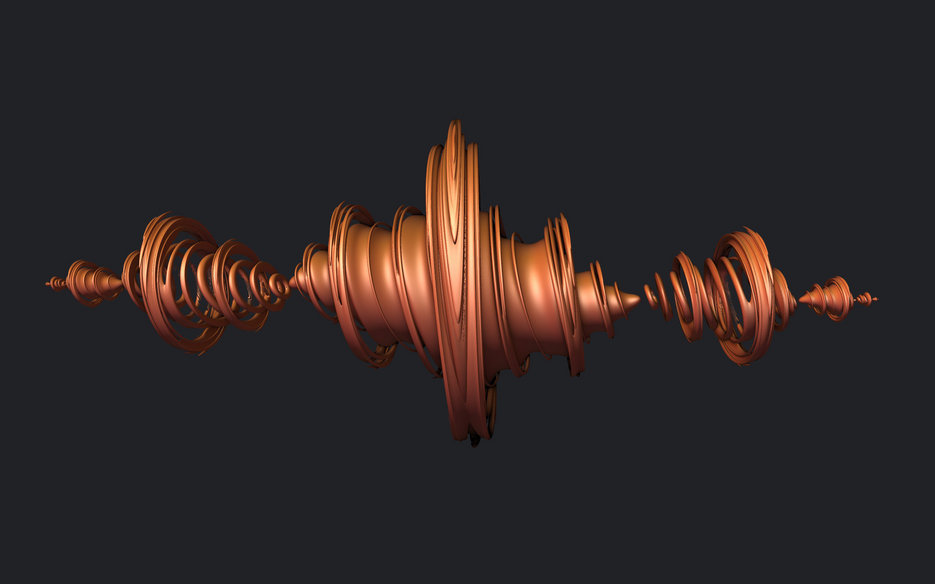
Also, are the examples you give (especially no.10, the orange one) done using the plugin with no further touching up? It's just that the ambient occlusion seems so tight, and the colours and specularity so lush in your images that I don't know whether I am trying too hard to get the same result straight from the filter.
Cheers.
Nik, if you open the .pbk file in a text editor and find the size parameter you can change the max value to something greater than 2048. I think the maximum Pixel Bender allows would be 4096 though.
All the images here are direct from the plugin. It can take a bit of play around with the colour, shadows and specularity settings until you get something nice.
Great, thanks for the quick reply! I'll give it a go.
Thanks again Tom, I'm able to get much bigger sizes now.
Just out of curiosity, I'm not really sure how Pixel Bender works, but would it be possible to output its results as a 3d model file? Something that could be opened in any full 3D package such as 3DS Max.
Cheers.
No problem Nik. At the moment these 3D fractals can't be easily exported to 3D meshes. To do this the fractal would need to be rendered as a voxel structure from which a mesh could be created. I'm planning to explore this soon.
Hi Tom (and everyone),
I really like what you've created here, and I'm getting some really nice results in the pixel bender tool kit.... so kudos to you for that Tom!
I just have a quick question relating to running it in After Effects, I'm pretty new to this kind of stuff and I'm not exactly sure how to do it properly.
Any advice you could give would be greatly appreciated, or even a nudge in the direction of some other online resources?
Keep up the good work!
Thanks Cai. To use in After Effects just put the Pixel Bender .pbk filters in a folder within the Plug-ins/Effects/ directory of your installation then it will be available from the Effects menu.
wow wow... very beautiful!